
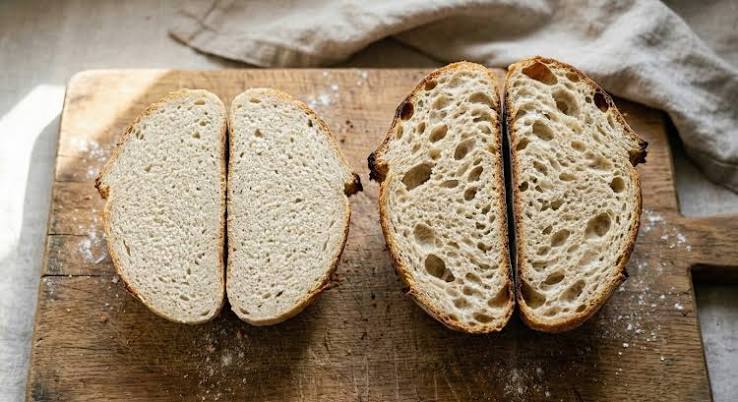
Why is my bread so dense is one of the most common questions home bakers ask after pulling a heavy, tight loaf out of the oven instead of the light, airy one they pictured.
Dense bread almost always comes down to a gas or gluten structure problem somewhere in the mixing, kneading, or proofing stages. It could be weak yeast, under-kneaded dough, too much flour, poor proofing, or an oven that never gave the loaf a proper rise.
The good news is that dense bread is one of the easiest baking problems to fix once you know exactly where to look.
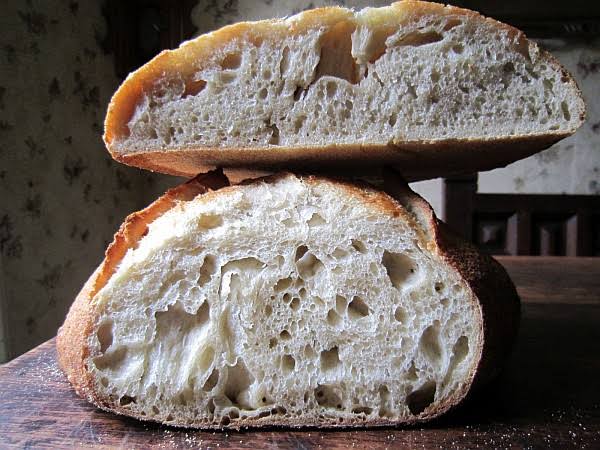
Bread rises because yeast produces carbon dioxide gas as it feeds on sugars in the dough. Gluten strands stretch around that gas and trap it inside the dough.
If either part of this system fails, whether the yeast is not producing enough gas or the gluten cannot hold it, the crumb stays tight, heavy, and compact instead of light and airy.
Almost every dense loaf can be traced back to one of a handful of common baking mistakes. The table below summarizes the most frequent culprits.
| Cause | What Goes Wrong | Fix Difficulty |
|---|---|---|
| Under-kneaded dough | Gluten network never fully develops | Easy |
| Too much flour | Dough becomes stiff and heavy | Easy |
| Weak or expired yeast | Not enough gas is produced | Easy |
| Under-proofing | Dough has not risen long enough | Easy |
| Over-proofing | Dough collapses and loses structure | Moderate |
| Liquid too hot | Yeast is killed before it can work | Easy |
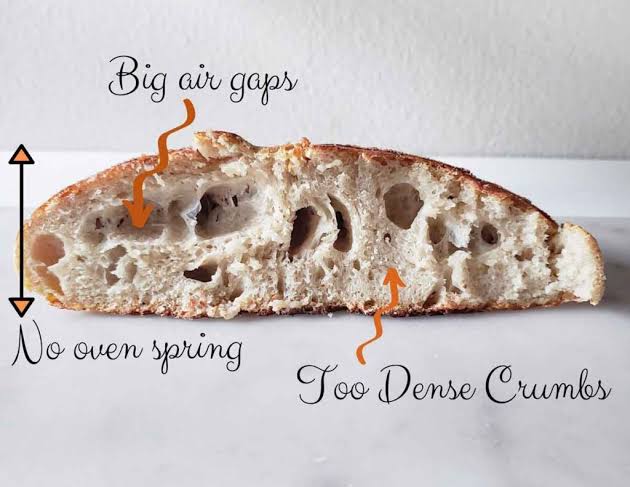
| Low oven temperature | Loaf never gets a proper oven spring | Moderate |
| Low-protein flour | Weak gluten network cannot trap gas | Easy |
Under-kneaded dough often looks fine on the outside but bakes into a dense, tight crumb on the inside. The gluten network simply has not had enough time to build strength.
Use the windowpane test to check readiness by stretching a small piece of dough until it becomes thin and translucent without tearing.
If the dough tears immediately instead of stretching thin, it needs more kneading time before moving on to its first rise.
While rare with hand kneading, running a stand mixer for too long can also weaken the gluten structure. Overworked dough loses elasticity and can no longer hold gas efficiently.
Watch the dough closely during mixing and stop as soon as it passes the windowpane test, since a few extra minutes can undo all the gluten development you built.
Folding techniques are generally gentler and less likely to cause over-kneading compared to continuous machine mixing, especially for beginner bakers.
Adding too much flour is one of the most common dense bread mistakes, especially when measuring by volume instead of weight. A packed measuring cup can add significantly more flour than a recipe intends.
Sticky dough early in mixing is normal, since the flour has not fully absorbed the liquid yet and the gluten network has not developed. Resist adding extra flour too soon.
Given enough mixing time or a few stretch-and-fold sessions, the dough will usually become smoother and stronger on its own without any additional flour.
Yeast that is old, improperly stored, or killed by hot liquid will not produce enough carbon dioxide gas to lift the dough. This is one of the fastest ways to end up with a dense loaf.
Always keep any liquid used to activate yeast under 115°F, since anything hotter can kill the yeast cells before they even get started.
Proof your yeast separately in warm water with a pinch of sugar before mixing, and confirm it bubbles within ten minutes to verify it is still active.
Bread becomes dense when not enough gas is retained in the dough before baking, and under-proofing is one of the most common reasons this happens.
Use the poke test to check proofing progress by pressing the dough gently with a wet finger. If it springs back instantly, it needs more time to rise.
The dough is ready to bake once the poke leaves an imprint that slowly springs back over two to three seconds rather than bouncing back immediately.
When dough over-proofs, the gluten structure becomes overstretched and can collapse either in the final rise or once it hits the heat of the oven.
Watch for translucent, thin-walled bubbles forming on the surface of the dough, which is usually a sign fermentation has gone on for too long.
Over-proofed loaves often have a crushed, gummy, or overly compact crumb even though the raw dough appeared to rise well before baking.
Flour with a lower protein content produces weaker gluten, which struggles to trap the gas yeast produces during fermentation. This is a common issue when substituting all-purpose flour for bread flour.
Bread flour typically has a higher protein percentage than all-purpose flour, giving the dough more strength to rise and hold its shape.
If you consistently get dense results with whole-grain or all-purpose flour, try switching to a dedicated bread flour or adding a small amount of vital wheat gluten.
An oven that is not hot enough will not give the dough the burst of heat it needs for proper oven spring, the final rapid rise that happens in the first few minutes of baking.
Always preheat your oven fully before baking, and consider using an oven thermometer since many home ovens run cooler than their dial suggests.
Baking on a preheated baking stone or steel can also help transfer heat more efficiently to the bottom of the loaf for a stronger rise.
Mixing salt directly against yeast before the dough comes together can slow down or damage yeast activity, since salt draws moisture away from the yeast cells.
Keep salt and yeast on opposite sides of the mixing bowl when adding ingredients, and let them combine naturally as you mix rather than placing them in direct contact.
This small technique adjustment is an easy fix that costs nothing and can noticeably improve how well your dough rises.
Losing patience during shaping can leave a loaf without enough surface tension, which affects how well it holds its structure and rises evenly in the oven.
A tightly shaped loaf with a smooth, taut surface traps gas more effectively than a loosely shaped one, resulting in better oven spring and a lighter crumb.
Practicing your shaping technique, even on simple round loaves, pays off quickly and is one of the more overlooked reasons bread turns out dense.
Catching a problem before the dough goes into the oven can save your loaf. Watch for these signs during mixing and proofing.
| Sign | Likely Issue |
|---|---|
| Dough tears instead of stretching thin | Under-kneaded |
| Dough feels slack and does not hold shape | Over-proofed |
| Dough barely rises after hours | Weak yeast or cold environment |
| Dough feels stiff and dry | Too much flour added |
| Surface bubbles look thin and translucent | Over-fermentation |
Once you know the likely cause, the fix is usually simple and does not require changing your entire recipe. Small adjustments make the biggest difference.
| Problem | Recommended Fix |
|---|---|
| Under-kneaded dough | Knead longer or add extra stretch-and-fold sessions |
| Too much flour | Weigh ingredients with a kitchen scale |
| Weak yeast | Use fresh yeast and check expiration dates |
| Under-proofing | Extend rise time and use the poke test |
| Over-proofing | Proof in a cooler spot and check earlier |
| Low oven temperature | Preheat fully and verify with a thermometer |
Flour measured by volume can vary significantly depending on how it is scooped, which throws off the balance of a recipe far more than most bakers realize.
Using a kitchen scale to measure flour and water by weight ensures consistent hydration levels, which directly affects how well the gluten network develops.
Most professional bakers rely on weight-based measurements for exactly this reason, since it removes one of the biggest sources of inconsistent results at home.
Dough hydration, or the ratio of water to flour, plays a major role in how open and light the final crumb turns out. Lower hydration doughs tend to bake denser.
Increasing hydration slightly can create a more open, airy crumb, but it also requires more careful handling since wetter dough is harder to shape.
If your bread consistently turns out dense, experimenting with a slightly higher hydration percentage in your next bake can be a simple way to test for improvement.
A cold kitchen slows yeast activity significantly, which can make it seem like your dough is under-proofed when it may simply need more time in a warmer spot.
Placing dough in a slightly warm oven with the light on, or near a warm appliance, can speed up proofing without overheating the dough.
Consistently proofing in the same environment each time helps you learn how long your dough typically needs, making future bakes more predictable.
Flour that has been stored improperly or for too long can lose some of its gluten-forming ability, contributing to a denser final loaf.
Store flour in an airtight container in a cool, dry place, and use whole-grain flours within a few months since they spoil faster than refined flour.
Keep yeast refrigerated or frozen if not used frequently, and always check the expiration date before starting a new batch of dough.
Some bread styles, like rye bread, whole-grain sourdough, or dense sandwich loaves, are naturally denser by design due to their flour type or lower hydration.
If you are following a recipe specifically meant to produce a denser, heartier loaf, a tighter crumb is expected and not necessarily a sign of a mistake.
Understanding the intended texture of a recipe before troubleshooting helps you avoid unnecessary changes to a loaf that may already be turning out correctly.
A common mistake is changing multiple variables at once, such as flour type, hydration, and proofing time in the same bake. This makes it impossible to know which change actually fixed the problem.
Another mistake is giving up on a recipe after one dense loaf without keeping notes on what was different about that specific bake, like kitchen temperature or ingredient brand.
Some bakers also rely purely on timers instead of visual and touch cues like the windowpane and poke tests, which are far more reliable indicators of readiness.
A digital kitchen scale is one of the most valuable tools for consistent bread baking, since it removes the guesswork from flour and water measurements.
An instant-read thermometer helps confirm both liquid temperature during mixing and internal bread temperature at the end of baking, which should typically reach around 190 to 210°F for most loaves.
A clear proofing container with volume markings makes it much easier to track how much your dough has actually risen compared to eyeballing it in a mixing bowl.
Start by weighing all ingredients precisely rather than using volume measurements, especially for flour, which is the easiest ingredient to over-measure by accident.
Knead until the dough passes the windowpane test, then allow it to proof in a warm spot until the poke test shows a slow, partial spring back.
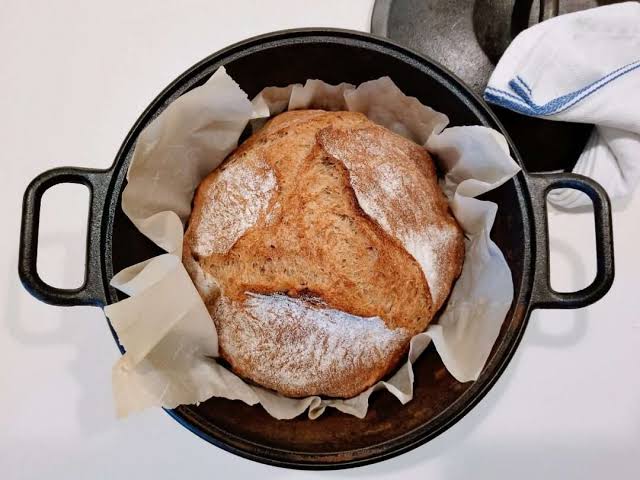
Shape the dough with enough surface tension to hold its structure, then proof a second time before baking in a fully preheated oven for the best possible rise.
Bakers at higher altitudes often notice denser bread because lower air pressure causes dough to rise faster but with less structural strength, leading to collapse before or during baking.
Reducing yeast slightly and shortening proofing times can help counteract the faster rise caused by high altitude, giving the gluten network more time to catch up.
If you consistently bake dense bread at a high elevation, altitude adjustments to your recipe are worth testing before assuming a technique mistake is to blame.
Sourdough bread can turn out dense if the starter is not active enough at the time of mixing, since a sluggish starter produces gas far more slowly than commercial yeast.
Enriched doughs, like brioche or milk bread, are more prone to density issues because added fat and sugar can slow gluten development and yeast activity if not balanced correctly.
No-knead bread recipes rely on long fermentation instead of kneading to build gluten strength, so cutting that resting time short is a common cause of dense results in this method.
Slicing into a finished loaf can tell you a lot about what went wrong, even after the fact, which helps you avoid repeating the same mistake.
A tight, uniform crumb with small, even holes throughout usually points to under-proofing or insufficient kneading rather than an ingredient issue.
A dense bottom half with a lighter top often suggests the dough was under-proofed before shaping, since gas tends to concentrate near the top during the final rise.
Gummy, wet-looking patches near the center of the loaf can indicate the bread was under-baked rather than simply dense from a proofing issue.
Before your dough goes into the oven, run through a short mental checklist to catch problems while there is still time to fix them.
| Checklist Item | Confirm This |
|---|---|
| Ingredients weighed | Flour and water measured by weight, not volume |
| Yeast tested | Bubbled within ten minutes during proofing |
| Windowpane test passed | Dough stretches thin without tearing |
| Poke test passed | Slow spring back after two to three seconds |
| Oven fully preheated | Confirmed with an oven thermometer |
| Shaping tension | Smooth, taut surface before final proof |
Working through this checklist consistently, bake after bake, is one of the fastest ways to move from unpredictable results to a reliably light, airy loaf.
A loaf can rise well but still bake dense if the gluten network was underdeveloped. The dough may look risen without having the strength to hold its structure.
Under-kneaded dough and under-proofing are the two most common causes for home bakers. Both prevent the dough from developing enough structure to trap gas.
Yes, adding too much flour makes the dough stiff and heavy, which limits how well it can expand. Measuring flour by weight helps avoid this mistake.
Proof it in warm water with a pinch of sugar and watch for bubbling within ten minutes. If it does not bubble, the yeast is likely dead.
Yes, over-proofed dough can collapse before or during baking, resulting in a gummy, compact crumb. The poke test helps you catch the right proofing window.
This usually points to under-kneaded dough or under-proofing, since the outer crust can look normal while the interior gluten structure remains underdeveloped.
Yes, a cold or improperly preheated oven prevents the loaf from getting the oven spring it needs. Using an oven thermometer helps confirm accurate temperatures.
Bread flour has a higher protein content, which builds stronger gluten and traps gas more effectively. This often results in a lighter, less dense crumb.
Kneading time varies, but the windowpane test is the most reliable way to check readiness rather than relying on a fixed time. Stop once dough stretches thin without tearing.
Salt itself does not cause density, but placing it directly against yeast can slow yeast activity. Keeping them separated during mixing avoids this issue.
Dense bread is frustrating, but it almost always comes down to a handful of fixable issues in mixing, kneading, proofing, or baking temperature. Once you understand that bread rises through a balance of gas production from yeast and gas retention from gluten, it becomes much easier to spot exactly where your process broke down.
Whether the cause is under-kneaded dough, too much flour, weak yeast, or a proofing window that was too short or too long, each problem has a simple, repeatable fix. Weighing your ingredients, using the windowpane and poke tests, and confirming your oven temperature are three of the most reliable habits you can build to consistently avoid dense loaves.
Dense bread is a normal part of the learning process for every home baker, and with a few small adjustments to your next bake, you can move confidently toward the light, airy crumb you were aiming for all along.