Why is my flashlight not working is one of the most frustrating questions you can face — especially during a power outage, camping trip, or emergency.
Whether you are dealing with a traditional handheld flashlight, a phone torch, or a rechargeable tactical model, the fix is almost always simpler than you think.
Most flashlight failures come down to a handful of very predictable causes: dead batteries, corroded contacts, a faulty switch, a damaged bulb, or a software glitch on your phone.
Before diving into fixes, it helps to understand the basic mechanics of a flashlight.
A flashlight is essentially a simple electrical circuit. Power flows from the batteries, through metal contact points, through the switch, to the bulb or LED, and back again.
If any single point in that circuit is broken — a dead battery, a corroded contact, a bent spring, a burned-out bulb — the circuit fails and the light goes out. That is why most flashlight problems are easy to diagnose once you know what to look for.
Phone flashlights work differently. The LED is built into the camera module and controlled by software. That means both hardware damage and software bugs can kill your phone torch.
Dead batteries are the number one reason a flashlight stops working.
Batteries lose charge over time — even sitting in a drawer. Alkaline batteries stored in a hot environment discharge faster than expected. Rechargeable batteries also lose capacity after hundreds of charge cycles.
The symptoms are gradual: the light dims slowly before going out entirely. If your flashlight died suddenly, the battery may have leaked internally.
Always replace batteries with fresh, high-quality ones from a reputable brand. Cheap batteries are more likely to leak and corrode your contacts over time.
This is easy to overlook but extremely common.
Batteries must be inserted with the correct polarity — positive end (+) and negative end (−) facing the right directions. If even one battery is reversed, the circuit is broken and the flashlight will not turn on.
Check the polarity markings inside the battery compartment. They are usually printed or molded into the plastic. Remove and reinsert every battery carefully.
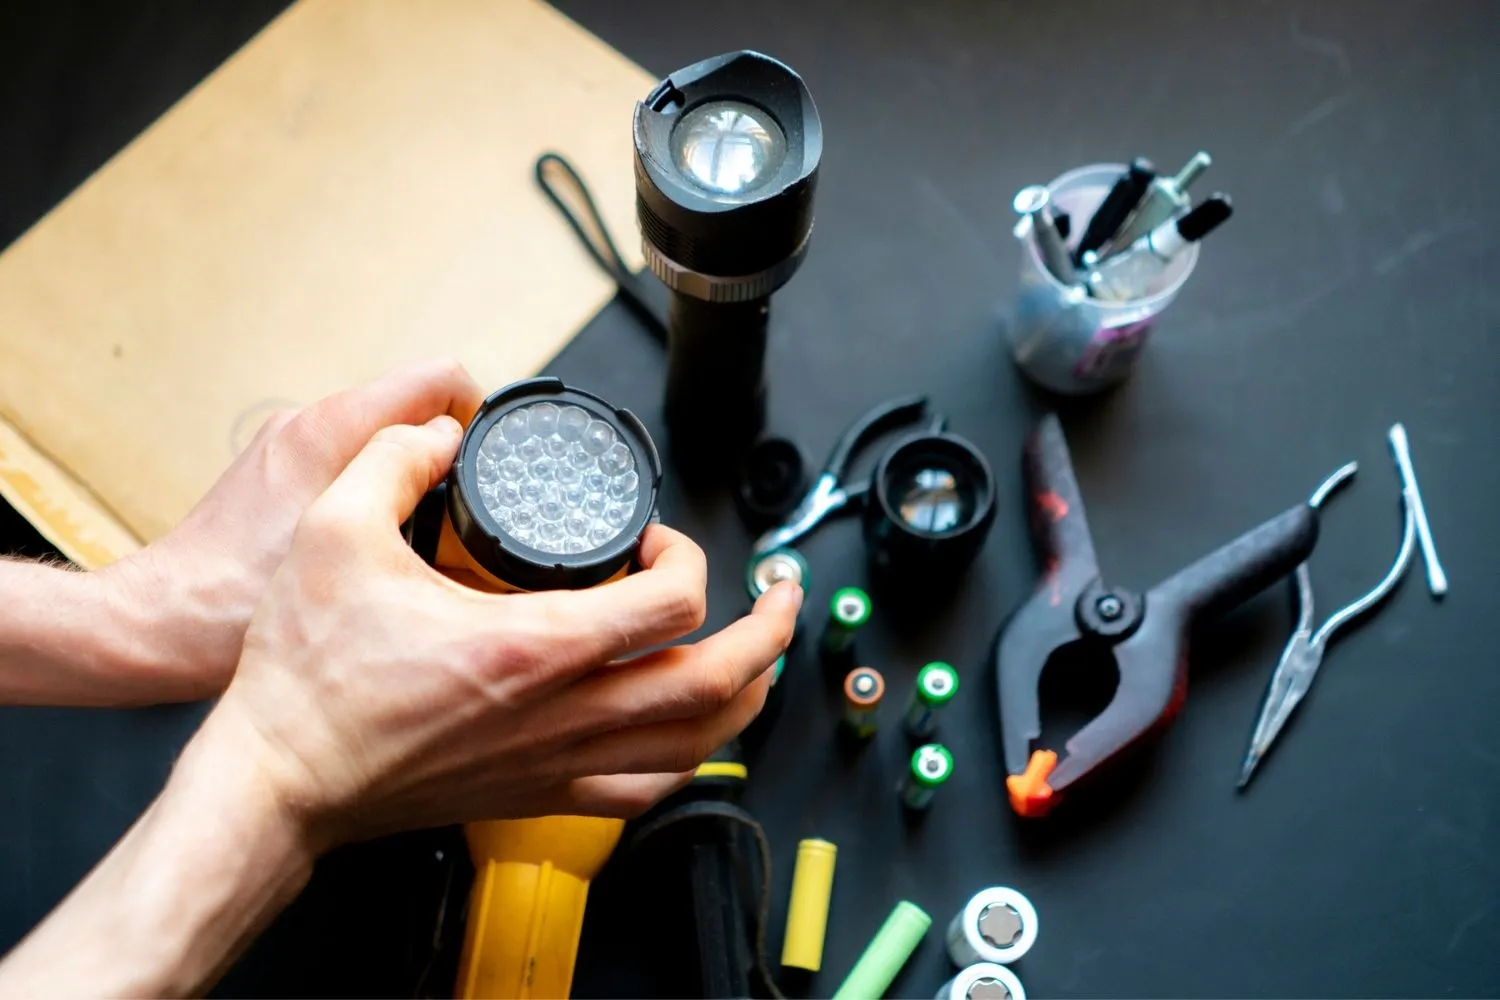
Corrosion is one of the most destructive and most common flashlight problems.
When batteries are left inside a flashlight for extended periods — especially alkaline batteries — they can leak a caustic substance that coats the metal contact points. This corrosion looks like a white, greenish, or bluish powder or crust inside the battery compartment.
Corroded contacts block electrical current from flowing. Even fully charged new batteries cannot power the flashlight if the contacts are coated in corrosion.
To fix it: remove the batteries, dip a cotton swab in white vinegar or isopropyl alcohol, and gently scrub the affected contacts. For stubborn corrosion, use fine-grit sandpaper or an emery board — but be careful not to remove too much metal. Wipe everything dry completely before reinserting batteries.
The switch inside a flashlight has two metal contact strips. When you press the switch, those strips complete the circuit and power the bulb.
Over time, switches can fail because of dirt buildup, moisture, corrosion on the contact strips, or physical damage to the mechanism. If the switch feels mushy, stiff, or does not click properly, it may not be making a clean connection.
Try pressing the switch repeatedly — sometimes dust or debris loosens with a few rapid clicks. If the switch is a tail-cap design, unscrew the tail cap and examine the contacts underneath. Clean the contact strips with vinegar or isopropyl alcohol, or gently bend any bent strips back into position.
Inside the battery compartment, there is typically a coiled metal spring that presses against the negative end of the battery.
If this spring becomes compressed, bent, or damaged — often from being dropped or overtightened — it loses tension. Without that tension, it cannot push the battery firmly against the opposing contact, breaking the circuit.
Open the battery compartment and inspect the spring. If it looks flattened or compressed, gently pull it outward a few millimeters to restore tension. This small fix solves a surprising number of flashlight failures.
In older incandescent flashlights, the filament inside the bulb burns out after prolonged use. You can usually spot this — look for a broken or darkened filament through the glass.
LED flashlights are far more durable, but LEDs can still fail — especially after physical damage, overheating, or manufacturing defects. Signs of a failing LED include flickering even with fresh batteries, a purple or blue tint to the light output, or sudden complete loss of output despite good batteries.
Replace the bulb with the same type and wattage listed in your flashlight’s manual. For LED modules, contact the manufacturer or take it to a repair shop, as LED replacement often involves the entire driver circuit.
Beyond corrosion, everyday dirt and dust can build up inside the battery compartment and between contact points, physically blocking the electrical connection.
Remove the batteries and use a dry cotton swab to clean the inside of the battery compartment. If contacts are visibly dirty, apply a small amount of rubbing alcohol on the swab and scrub gently. Let everything dry completely before reassembling.
Never use water directly inside a flashlight — moisture accelerates corrosion and can damage internal electronics.
Water ingress is a common cause of flashlight failure — even in flashlights marketed as water-resistant.
Water causes two problems: it can short-circuit internal components immediately, and it accelerates corrosion on contact points and wiring over time. Even humidity in a storage drawer can cause gradual long-term damage.
If your flashlight got wet, remove the batteries immediately. Allow the flashlight to dry fully in a warm, dry place — ideally with the battery compartment open — for 24 to 48 hours before testing. Silica gel packets placed nearby help absorb residual moisture.
For future protection, look for flashlights rated IPX4 (splash-resistant) or IPX7 and IPX8 (waterproof to specific depths).
Some flashlights — especially high-output LED models — can overheat during extended use and automatically shut down to protect their electronics.
If your flashlight was running for a long time and then stopped working, overheating may be the cause. Turn it off, remove the batteries, and let it cool for 10 to 15 minutes before testing again.
Many modern tactical and LED flashlights have built-in thermal protection that reduces output or cuts power when they reach a critical temperature. This is normal and is not a sign of permanent damage.
Many advanced flashlights — especially rechargeable and tactical models — have a lockout mode designed to prevent accidental activation in a pocket or bag.
If your flashlight will not turn on at all despite good batteries and clean contacts, check whether it is in lockout mode. The procedure varies by model but typically involves holding the power button for 5 to 10 seconds to unlock it.
Check the manufacturer’s user manual for the specific sequence. Accidental mode changes can also make a flashlight appear broken when it is actually stuck in strobe, SOS, or low-power mode.
Dropping a flashlight can jostle internal components — loose bulb sockets, disconnected wires, or shifted driver boards — without causing any visible external damage.
A flashlight that works when you press on it or tap it is a classic sign of a loose internal connection. Unscrew the head of the flashlight and check that the bulb or LED module is fully seated and that no wires appear disconnected.
Unless you are comfortable with small electronics repair, serious internal component issues usually warrant professional repair or replacement.
Phone flashlights fail for entirely different reasons than handheld flashlights. Here is a complete breakdown.
The single most effective fix for a phone flashlight not working is a simple restart.
A restart clears temporary software conflicts, app crashes, and memory issues that can lock up the camera module or the torch function. Many users who restart their phone find the flashlight works immediately afterward — without any other intervention needed.
For iPhone: hold the side button and either volume button until the power slider appears. For Android: hold the power button and select Restart.
Most phones disable the flashlight automatically when the battery drops below a critical threshold — typically around 10 to 20%.
Power saving mode also frequently disables the torch to conserve battery. Check your battery level and charge the phone if it is low. Go to Settings and turn off Battery Saver or Low Power Mode, then test the flashlight again.
Your phone flashlight and camera share the same LED hardware. If the camera app is open — or has crashed and is running in the background — it may be locking the flash and preventing the torch from activating.
Force-close the camera app completely. On iPhone, swipe it away from the app switcher. On Android, go to Recent Apps and swipe the camera away. Then try the flashlight again.
On Android phones, a corrupted camera app cache can prevent both the camera and the flashlight from functioning correctly.
Go to Settings > Apps > Camera > Storage > Clear Cache. This does not delete your photos or settings. After clearing the cache, restart the phone and test the flashlight to see if the issue is resolved.
A flashlight that stopped working after a software update is almost certainly a software bug, not a hardware failure.
Check whether a new OS update is available. On iPhone: Settings > General > Software Update. On Android: Settings > System > System Update. Applying the latest patch often resolves camera and torch bugs introduced by previous updates.
Safe Mode disables all third-party apps and runs only the phone’s core system software.
If the flashlight works in Safe Mode but not normally, a third-party app is interfering with it — likely one that accesses the camera. Press and hold the power button, then long-press Power Off to boot into Safe Mode. Test the flashlight, then identify and uninstall the conflicting app after rebooting normally.
A trick that works for many iPhone users: open the Camera app, switch to Video mode, enable the flash, and record a brief clip in a dark room. This forces the LED to activate physically through the camera system.
After the LED fires through the camera, exit the camera app and try the Control Center flashlight button again. Many users report this resets the LED connection and restores normal torch function immediately.
If the above steps have not worked, resetting all settings can resolve deeper software configuration issues without deleting your data or photos.
On iPhone: Settings > General > Transfer or Reset iPhone > Reset > Reset All Settings. On Android: Settings > General Management > Reset > Reset All Settings. Wi-Fi passwords and app preferences will need to be reconfigured afterward, but your files remain intact.
If all software fixes have failed and a hardware diagnosis is not yet confirmed, a factory reset is the final software-level solution.
Back up all your data first — a factory reset erases everything on the device. If the flashlight still does not work after a factory reset, the problem is definitively hardware-related and requires professional repair.
If you have tried every software fix and the phone flashlight is still dead, the LED or camera module has likely suffered physical damage.
Common hardware causes include: a drop that cracked the LED, water damage to the camera circuit, or a loose ribbon cable connecting the camera module to the motherboard. The LED on a phone is not user-replaceable — it is permanently integrated into the rear camera unit.
At this point, professional repair is the correct path. Attempting to open a modern smartphone without the right tools and experience can make the damage significantly worse.
Rechargeable flashlights have a few extra failure points beyond standard battery-powered models.
| Problem | Likely Cause | Fix |
|---|---|---|
| Will not charge at all | Faulty cable or charging port | Try a different cable and adapter |
| Charges but dies quickly | Battery near end of life (300–500 cycles) | Replace the battery |
| Charges but will not turn on | Over-discharged lithium cell | Use a smart charger to wake the cell |
| Charging port blocked | Dust or corrosion on charging pins | Clean with soft brush and isopropyl alcohol |
| Works only while on charger | Battery fully dead | Replace battery or upgrade the model |
Lithium batteries in rechargeable flashlights can fully discharge to a point where a standard charger cannot detect them. A smart charger with a battery rescue or wake-up function can often recover these cells and restore full capacity.
If your rechargeable flashlight has had ongoing charging issues for several months, or if the battery has completed 300 to 500 full charge cycles, it is due for replacement.
| Symptom | Most Likely Cause | First Fix |
|---|---|---|
| Completely dead, no light | Dead batteries | Replace batteries |
| Dim light only | Low battery voltage | Replace batteries |
| Flickering light | Loose spring or dirty contacts | Clean contacts, check spring tension |
| Works when tapped | Loose internal component | Inspect and reseat bulb or LED module |
| Works only when pressed hard | Faulty switch | Clean or replace switch contacts |
| Dead after getting wet | Water or moisture damage | Dry fully for 24–48 hours then test |
| Dead after a drop | Loose connector or cracked LED | Professional repair |
| Phone torch greyed out | Low battery or camera conflict | Charge phone, close camera app |
| Phone torch dead after update | Software bug | Update OS or reset all settings |
| Phone torch dead after drop | Camera module hardware damage | Professional repair |
Most flashlight failures are preventable with simple routine maintenance.
Remove batteries during long-term storage. Alkaline batteries left in a device for months — especially in heat — are prone to leaking. Leaking battery acid destroys contacts and can make a flashlight permanently non-functional. Remove batteries if the flashlight will not be used for more than four to six weeks.
Store in a cool, dry place. Heat degrades battery life and accelerates corrosion. Humidity causes moisture buildup inside the casing. A cool, dry drawer or a waterproof storage case is ideal for both the flashlight and spare batteries.
Use quality batteries. Budget batteries leak more often and provide less consistent voltage. Stick to trusted brands — Duracell, Energizer, or Panasonic for alkaline cells; LG, Samsung, or Panasonic for rechargeable 18650 lithium cells.
Clean threads and contacts every few months. Unscrew the battery cap and wipe the threads and internal contacts with a dry cloth. Apply a thin layer of silicone grease to O-rings and threads to keep them sealed and easy to operate.
Store rechargeable batteries at 50 to 70% charge. Do not store lithium rechargeable flashlights fully charged or fully depleted. The optimal storage charge level is between 50 and 70% for maximum battery longevity and health.
Inspect and replace O-rings. O-rings are the rubber seals that keep moisture out of the battery compartment and head. Over time they dry out and crack. Inspect them periodically and replace them if they look brittle or damaged.
Test emergency flashlights monthly. A quick 30-second test once a month confirms the batteries are still good and the flashlight will work when you actually need it in an emergency.
| Situation | Recommendation |
|---|---|
| Dead batteries or minor corrosion | Repair — simple fix, cost under $5 |
| Faulty switch on a quality flashlight | Repair — switch replacement is inexpensive |
| Burned-out incandescent bulb | Repair — bulb is cheap and easy to swap |
| Failed LED on a budget flashlight | Replace — repair cost likely exceeds value |
| Water damage on a cheap model | Replace — not worth the repair investment |
| Cracked or broken casing | Replace — structural integrity is compromised |
| Phone flashlight hardware failure | Professional repair — LED is part of camera module |
| Repair cost over 50% of original value | Replace — upgrade to a better modern model |
As a general rule: if the repair cost exceeds 50% of what the flashlight originally cost, replacement is the smarter investment — especially since modern LED flashlight technology delivers far better brightness, battery life, and durability than older designs at very affordable prices.
| Flashlight Type | Most Common Failure | Best Prevention |
|---|---|---|
| Standard alkaline (AA/AAA) | Battery leakage and corroded contacts | Remove batteries when not in use |
| LED tactical flashlight | Lockout mode or overheating | Read manual; allow cooling time between uses |
| Rechargeable (18650 lithium) | Over-discharged battery or charging port | Use smart charger; clean port regularly |
| Waterproof or dive light | O-ring failure and moisture ingress | Inspect and grease O-rings before each use |
| Phone flashlight — iOS | Software bug after update or camera conflict | Keep iOS updated; restart phone regularly |
| Phone flashlight — Android | App conflict or corrupted camera cache | Clear cache; use safe mode to diagnose |
| Headlamp | Contact corrosion from sweat or rain | Rinse after outdoor use; store without batteries |
| Vintage incandescent | Burned-out filament bulb | Keep spare bulbs; consider upgrading to LED |
New batteries alone do not fix the problem if the issue is corroded contacts, a faulty switch, or a damaged bulb. Inspect and clean all contact points before assuming the batteries are at fault.
Software updates can introduce bugs affecting the camera module and torch function. Check for a newer OS update that patches the issue, or perform a settings reset without erasing your personal data.
Remove the batteries, dip a cotton swab in white vinegar or isopropyl alcohol, and gently scrub the corroded contacts. Wipe everything completely dry before inserting fresh batteries.
Flickering usually points to a loose battery spring, dirty or corroded contacts, or a low battery that cannot maintain consistent voltage. Clean the contacts and check the spring tension first.
Sometimes. Remove the batteries immediately, allow the flashlight to dry with the battery compartment open for 24 to 48 hours, then clean any corroded contacts before retesting. Success depends on how much water entered and how quickly you acted.
A flashlight that works only when tapped has a loose internal component — usually a loose bulb, an unseated LED module, or a partially disconnected wire. Unscrew the head and inspect for anything that has shifted or come loose.
Most flashlights exit lockout mode by holding the power button for 5 to 10 seconds. The specific sequence varies between brands and models, so check your user manual for the exact procedure.
Check the charging cable and adapter by swapping for known working ones. Clean the charging port with a soft brush. If the battery is over-discharged, a standard charger may not detect it — use a smart charger with a battery wake-up or rescue function.
No. Alkaline batteries left in a flashlight for extended periods — particularly in warm environments — are prone to leaking and corroding the internal contacts. Remove batteries if the flashlight will not be used for more than four to six weeks.
Replace the flashlight when the repair cost exceeds 50% of the original purchase price, when the casing is structurally cracked or broken, or when multiple components have failed simultaneously. Modern LED flashlights are inexpensive and far more reliable than older designs.
Why is my flashlight not working almost always has a straightforward answer — and in most cases, a straightforward fix. Start with the simplest possibilities first: replace the batteries, double-check polarity, and clean the contacts.
If those steps do not work, test the switch, inspect the spring, and look carefully for signs of water damage or overheating. For phone flashlights, a restart solves the problem more often than any other fix.
Clearing the camera cache, disabling power saver mode, and applying the latest software update handle most software-level phone torch failures. Only reach for a factory reset or professional repair when every other option has been fully ruled out.
With the right diagnostic approach and a few basic tools, most flashlight problems take less than ten minutes to fix — and knowing what to look for means you will never be left completely in the dark when it matters most.