
Starting a vending business is one of the most exciting ways to build passive income, but the transition from buying your first machine to placing it in a high-traffic location requires a bit of administrative heavy lifting. Many entrepreneurs find that property managers and business owners will not even let a machine through the front door without proof of protection. This is where a comprehensive vending machine insurance guide becomes an essential tool for navigating the professional requirements of the industry. Understanding the path from a basic quote to full coverage ensures that your investment is protected from the very first day of operation.
While most beginners understand the general concept of insurance, the actual “how-to” can feel like a maze of paperwork and industry jargon. This checklist is designed to demystify the application process, helping you move through the administrative hurdles with confidence and speed.
Before you even call an agent or visit a quote portal, you need to have your “business house” in order. Insurance companies assess risk based on who you are and how you operate. If you show up with organized data, you are likely to get a more accurate quote and a faster approval.
Most insurers prefer to write policies for established legal entities rather than individuals. If you are operating as an LLC or a Corporation, have your Articles of Organization or your Employer Identification Number (EIN) ready. This separates your personal assets from your business liabilities, which is the primary reason for getting insurance in the first place.
You cannot insure what you cannot define. Create a simple spreadsheet that includes the following for every machine in your fleet:
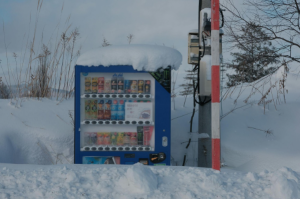
Vending insurance is not a one-size-fits-all product. Depending on where your machines are located and what they sell, your needs will vary. Generally, there are two main pillars you need to consider.
This is the “must-have” coverage. It protects you if your machine causes bodily injury or property damage. For example, if a machine tips over and injures a customer, or if a faulty electrical connection causes a fire in the host building, General Liability is what keeps you from going bankrupt. Most location owners will require at least $1 million in liability coverage.
While General Liability protects others from your machine, BPP protects the machine itself. This covers perils like fire, lightning, and sometimes vandalism or theft. If you are placing machines in high-risk areas, ensure your BPP includes “off-premises” coverage, as some standard policies only cover items located at your primary business address.
One of the most common stumbling blocks for beginners is choosing a deductible. The deductible is the amount of money you pay out of pocket before the insurance company kicks in.
When choosing, ask yourself: “If a machine was destroyed tomorrow, how much cash could I realistically part with without hurting my ability to pay rent or buy stock?”
With your documents ready and your coverage limits decided, it is time to engage with providers. You can choose between a local independent agent or an online specialty insurer.
Expect to answer questions about your “projected annual gross sales.” Be honest but realistic. If you are just starting, provide a conservative estimate based on your market research. You will also be asked about the types of products you sell. Selling “high-risk” items like hot coffee or CBD products may slightly increase your rates compared to selling pre-packaged chips and water.
When the quote arrives, do not just look at the price tag. Look for “Exclusions.” Some policies might exclude “theft from an unattended vehicle” or “vandalism” unless specific security measures are met. Make sure the policy actually covers the specific risks you are worried about in your local area.
The final step is often the most important for your growth. Once you pay your premium and the policy is “bound,” you need to request a Certificate of Insurance, specifically the Accord 25 form.
This is a standardized one-page document that summarizes your insurance coverage. It is the industry standard that property managers use to verify you are covered.
Most location owners (like a gym owner or an office manager) will ask to be named as an “Additional Insured” on your policy. This means that your insurance will also protect them if your machine causes an issue on their property.
Securing insurance for your vending business might feel like a distraction from the fun parts of the job, like choosing snacks or collecting quarters. However, completing these five steps builds a foundation of security that allows you to scale without fear. By organizing your LLC info, valuing your machines accurately, and understanding how to produce an Accord COI, you transform from a hobbyist into a legitimate business owner.
The administrative process is simply a series of checkboxes. Once they are marked off, you can focus on what really matters: finding the best locations and keeping your customers happy.